Saturday, December 28, 2013

Homemade Christmas: Ojo de Dios

This year in our homeschooling we went through Level 1 of La Clase Divertida.  We loved it and are looking forward to Level 2 once we get back to school in January.

One of the crafts we did together during Level 1 was the Ojo de Dios, or Eye of God.  This is a traditional Mexican craft that is also a part of the cultures of other Latin American countries.  One of my children had the great idea to incorporate this craft into our homemade Christmas plans.  As a result, she and I made about 40 of these!  It was fun, and we gave them to family and friends and also to our neighbors with the description and history of the Ojo de Dios and this verse:

" I will instruct you and teach you in the way you should go.  I will counsel you with My eye upon you." (Psalm 32:8 ESV)

We also decided to give one of my nephews a kit to make his own Ojo de Dios with a completed one for him to have and a link to this video I made to show him how to do it.


By the way, it was pretty awesome how we got the supplies together for this craft.  We had a whole bag of these cake pop/popsicle sticks already, and the yarn was given to me by a friend recently after I had been looking for multi-colored yarn at a few craft stores nearby.  Thanks, God!  It came together quite nicely.

Enjoy making you Ojo de Dios, and don't forget to share them with others.

Tuesday, August 13, 2013

Homemade Christmas: Reclaimed Music Sheet Art

I am a wanna be musician.  I am learning how to play the ukelele and the violin, but I can't learn fast enough!  It is something I wish I would have started when I was much younger, but nonetheless I'm still going for it now.

I love music, and I love notes on a page (which by the way I also want to learn to read those notes, so I'm working on that also).  I started noticing that I had some friends with old sheet music they really didn't want.  Instead of throwing it away they gave it to me!  Now I had some new material for new creations.

This is actually my second creative session with these sheets of music.  I made some necklaces with some of it, too, which you can see here.  Some of them already sold, but more will be coming soon.  These necklaces are some of my absolute favorite items at Golden Apples Designs, so I will be making more in the near future.

Here are the materials with which I started.  They were accumulated through clearance sales, gift card purchases, or broken things I thought might work out into something cool one day.  That small brown frame with no back, for example, was the top of a small music box that broke.


And so I began.

I used glue, just plain old craft glue, and carefully attached the pieces of sheet music to a couple of the frames and used the sheet music to cut out pictures for other frames.  I also had the ocean picture printed along with the picture that has Victor Hugo's quote about music.  After only a couple of hours total (some was drying time), here is the result:


So here are five more gifts ready for Christmas, and it only cost me a couple of hours and about $7 total that I spent over the last eight months or so on the frames.

I'll be doing some more of this soon and listing some similar music sheet creations at Golden Apples Designs.

Join me in my Homemade Christmas Project and begin making gifts each month for Christmas.  I would love to see what you have created, so feel free to email me or post pictures on our Facebook page!

Saturday, July 27, 2013

Skirt/Dress from Panamanian Fabric

During our trip to Panama, we took several opportunities to support local artisans and buy handmade items for gifts and also some goodies for ourselves.  I was looking to buy a skirt or something fun to wear when I stumbled upon a fabric store!

Even better!

I had a great time with the ladies who worked there as I tried to speak Spanish and pick out two lovely prints.  One of them is a traditional print that is used to make the large and beautiful skirts they use for traditional Panamanian dancing.  So I bought two yards of each (although now I wish I would have bought more!) and starting thinking about what I would do with them.

It wasn't until I was packing for a trip to California for a wedding that I realized exactly what I wanted to do with the traditional print fabric.  I would make a dress to wear to the wedding!

And so it began.

I also thought it would be fun and cute to make a little skirt for my youngest who is coming with me, as well.  Here is the fabric cut out and ready.  I used skirts we already had as a pattern, and I cut out the long pieces to become the ruffle at the bottom.

I have a lot to learn when it comes to proper tailoring techniques, but I like to jump in and learn as I go sometimes.  Occasionally that results in some trouble shooting, which happened on this day, but eventually the final product comes out great in the end.  I like to experiment on things that will be for us anyway.

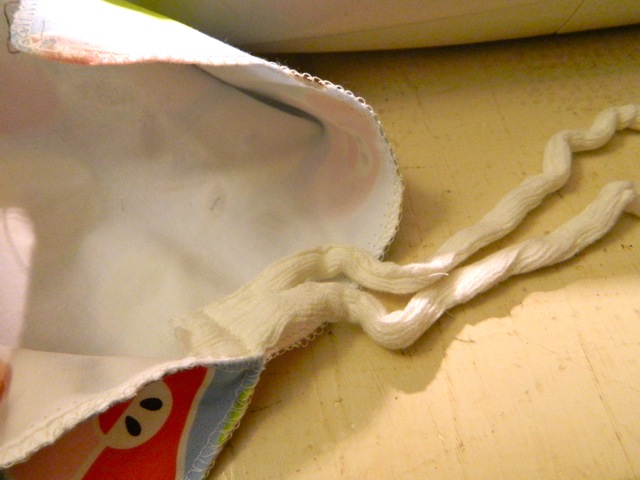
I worked on the little one's first thinking that would be a good way to practice for the big one.  I love making little skirts.  They don't require much fabric or experience or skill really, and they are so cute!  Here is what I cam up with for her.


I had to redo the seams a bit because I actually made it too small at first.  However once it was done, I was very pleased with the outcome.  So cute!

So then it was my turn.  I had a couple of different ideas for it, and I tried to get a few of them going, but then I realized it would be great to have a dress that could also be worn as a long skirt, and a skirt that can also be worn as a dress.  I did put some elastic in the waistband/top band which happens to work for my size.  This allows it to be more secure either way I am wearing it.  The ruffle at the bottom was made by using twice the length of the bottom of the skirt/dress.


I love versatility, so I love that I can also dress it done and wear it as a fun maxi skirt.  And all of this for just $2 a yard!  I love the brilliant blue and the little red and yellow pops in the flowers.  They had this fabric in yellow and orange, too, and in the markets I saw skirts made with it out of teal and red with the same pattern. 


Maybe next time I will get enough to actually make one of their native skirts for traditional dancing!  It is so much fun with tons of flowing fabric.  We had the chance to see some of this dancing at a rehearsal we found out about, and they were gracious enough to let us come in a watch!  It was beautiful just like the country of Panama and their people.  


And now I have a wedding to get to where there will be lots of latin dancing and rejoicing because of the Lord bringing together two wonderful people to unite in a covenant of marriage.  

I should have added some pockets for tissues!  

Thursday, May 16, 2013

Summer Goals

I really love summer.  My husband is in education, so he gets a significant and well deserved break during the summer.  This means more family time and more time for me to get some extra special projects done.

In addition to some exciting travel and missions opportunities we have planned for the summer and some household projects I'll have more time for I have some arts and crafts goals, as well.

1. Homemade Christmas 

Continue with my Homemade Christmas plans to make more items to be given away at Christmastime.  I am working on making these items every month, so that I won't be overwhelmed with how many people are on my Christmas list come November.

2. Begin to Learn to Crochet

I don't expect masterpiece skill level by September, but I would like to get the ball rolling in that direction.  I have always wanted to learn to crochet, and I happen to have some really cute yarn waiting for me to bring it to life.  I have a curriculum style program I picked up at a homeschool conference that I will be using for this.  It's called "Sew Teach Me."

3. Make Some Maxi Skirts

I have a hefty supply of fabric that I have acquired over the last few years or more.  One thing I would love to make with it are some cute, trendy, and feminine maxi skirts.  I love a good long skirt, so I have been collecting ideas, tutorials, and technique tips to do this.

4. Paint Big Blank Canvas in Dining Room

I got a great deal on a huge canvas about a month ago, and I put it up on the wall where I want it in our dining room.  I have some ideas, but haven't taken the plunge yet on completing it.  I really want this to be a great piece that represents our family, so I look forward to this project!

5. Paint Party!

I have recently noticed that there are several ladies at my church who paint and are great artists!  I would love to organize a fun get-together for us to paint and inspire each other while being refreshed and encouraged.  Wouldn't that be so fun?

What are your summer arts and crafts goals?  Check out our boards on Pinterest for some great inspiration!

Tuesday, May 7, 2013

Homemade Christmas: Diapers and Wipes To Go Pouch


I have a bunch of fabric.  Most of it was given to me at some point over the years, and some of it I bought.  I love this idea because it is an easy way to use cute fabric for something that will be used well.

You know, if you are going to have to change a diaper at least you can have a cute little diapers and wipes pouch to brighten the moment.  Of course your little one can brighten it even more, so use changing time as an opportunity to smile and tickle and remind him of how much you love him...even if he is stinky sometimes. ;)

I made these to fit about 5 disposable diapers and flat wipes container or a couple of cloth diapers and wipes depending on what you use and what size they are.  The idea is that with this little pouch, you can go places without the big ole diaper bag sometimes.  Or if you need to go change a diaper, you can grab it out of the big ole diaper bag and just carry that to the bathroom.

So here is how I did it:

Measure your fabric to about 29 inches long and 8 inches wide.  I made this bigger than other pouches like this in order to accomodate those who use cloth diapers which take up more space.  Cut the fabric that will be the outside of the pouch and the fabric that will become the inside using these measurements.
 
Pin the edges together (right sides out, since I am serging them together) and get ready to surge one end (You can also put the right sides in, sew the seams, and turn it right side out if you don't have a serger).  Surge one end because this will be the top edge of the inside:


Pin edges together to get ready to serge the whole thing.  Serge around the edges starting at the bottom of one side, so you can continuously serge the whole piece, or do one side at a time:


Tie and trim the thread.  Then place button and sew it one making sure it is secure.


Sew string, trim, or whatever you have that will become the button fastener.


Sew the handle on.  I used some trim from curtains.  I had saved these knowing that one day they will be useful for something.  I have used them with several different projects actually.


And here are the finished products:


I have some ideas for embellishing these, too, but for now I have ten more Christmas gifts ready!

I'm going to make a bunch of these for family, friends, and moms I know.  There will also be some available at Golden Apples Designs.

Enjoy!

Monday, April 22, 2013

Mothers' Day Custom Paintings

Back in November I have the privilege to be a part of a wonderful modern dance piece about being a wife, a mother, and a follower of the Lord.  It was a refreshing and fun piece about the peace we receive from the Lord each day and the joy He gives us.  I loved dancing with the women He had brought together to do this, and it really thrusted me back into choreography again, something I had been wanting to pursue again for some time.

One night, as I was ready to fall asleep I got a great idea.  It was an idea for some set design for our piece.  I would paint portraits of each one of us with our children, and we could display them on the stage during the piece.

I went to work the next day and gave it a try.  After finishing one I knew the other ladies would like them, so I continued to work on the rest.  I knew their children and also looked at countless pictures of them to get their hair and size and shaping right.


After many people asking me if I would paint these and sell them for their families, I decided to list them on Etsy.  This would especially be a great Mothers' Day gift, but I can do them any time of year.

I also will work with other sizes than the ones already listed in my shop.  Contact me with any inquiries.

And if you are wondering why I didn't paint the facial features...  I can't.  I'm not great at painting facial features to look like the actual person I am trying to paint.  haha!  That is why.  I could pretend it was some artistic choice, but it really wasn't.

I love having mine hanging up in our home.  It reminds me of the blessing it is to be a wife and a mother.  It will be neat to have this moment in time captured on canvas, as well, since they are of course ever growing each day.

Friday, April 19, 2013

My Favorite Piece (For Now)

People often ask me, "What is your favorite item you have made?"

That is an easy question for now.  My favorite, so far, is a painting I created for my own home.  I found the canvas by a dumpster after I watched one of my neighbors bring it there.  It was an old framed painting of a southwest landscape.

I had it for a couple of months before I finally knew what I wanted to paint on it.  I love sheep.  I love the imagery of sheep in the Bible and the description of Jesus as my Good Shepherd.  There are so many rich lessons to be found in the scriptures that describe sheep and shepherds, and I am always amazed and encouraged to learn more and more.

And so, this is what came out of me through my paints and paintbrushes:


So here we are in a lush pasture grazing by still waters trusting the Good Shepherd to take good care of His sheep each day.  I love this painting.

It was a free canvas that was going to be discarded unfortunately.  I didn't show a before here because I hope the original artist would not see that her painting was not only thrown out but also painted over!  It is a very large piece, and I get to see it and enjoy it everyday.

Now for an idea for the large canvas hanging up in my dining room...

Friday, March 29, 2013

Homemade Christmas: Stenciled Paintings


I really enjoy painting.  I don’t do it as often as I would like, but I am working on that.  For this month’s Homemade Christmas installment, I painted.  This time I used stencils for some word art.
First I gathered up some old paintings that I tried to sell at craft shows or on Etsy that never sold.  It was time to paint over them to make something better.  I love painting over old paintings because it adds texture and dimension to the new one.  I also had a couple of new canvases stored away, so I got those out, too.  I use acrylic paints, and my favorite technique is not washing the brush in between colors in order to blend them like you’ll see on the first two paintings.
Normally I would have some before pictures here, but I painted these on vacation, and in the excitement of the moment I forgot to take before pictures.  I guess I was just thrilled to have a few hours for painting, so I was full speed ahead.  I’ve mentioned before that I can be rather task-oriented at times.
Anyway, here are the final results:
DSCN2240
DSCN2241
The 23rd Psalm is my favorite, so I love these.

And these were inspired by the hymns Come Thou Fount and Tis So Sweet to Trust in Jesus
Last Import - 27
Last Import - 32

And finally, these were inspired by my focus on joy this year.
Last Import - 29


Last Import - 34

Now I am one more month closer to being ready for a Homemade Christmas this year!  These will also be for sale at Golden Apples Designs.
Did you work on your Homemade Christmas this month?  Post your pictures on our Facebook page.

Friday, February 15, 2013

Homemade Christmas: Guitar String Jewelry


This idea came to me after Christmas when my husband was restringing my sister’s fiance’s guitar.  What do you do with the old strings?  It seemed like a waste of a perfectly good set of art supplies to me, so I began to ask for old guitar strings from musicians I know.
This idea is evolving, and I do plan to perfect it and post items on Etsy in the future.  I have some more work to do before I get to that point however.  For now I will be practicing and making Christmas presents from these old guitar strings I have acquired.
DSCN2266I started with some strings of various lengths, thickness, and colors.  I also had some stones and crystal pieces that I thought would be fun to incorporate.

DSCN2276Then I began to form the rings and earrings you see here by twisting the strings around each other.  This was not easy.  In fact, I think I need some tools to help this process be more smooth and less painful.  Those ends can be sharp!  However, the final result was not bad.  I really like the earrings.  They are simple and elegant, and very lightweight.  I love long dangly earrings, but they often get so heavy.  These are not.
DSCN2274Have you ever made jewelry (or anything else) out of guitar strings?  I would love to hear about it.  I think it is going to be fun to continue to play around with this idea and develop a specific style that works well and looks great!  I love reusing something that would have otherwise be thrown away, and I love music.  DSCN2279This makes a project like this one really fun.
DSCN2280
The next project for Homemade Christmas will not take me nearly as long, so stay tuned for the next installment.

Thursday, January 17, 2013

Homemade Christmas: Introduction and Monogram Art

I have quite a stash of fabric, crafting items, paints, buttons, and more.  Many, if not most, were acquired one way or another through benevolence or trash-picking of sorts (I don’t think I ever actually went into any dumpsters or real trash receptacles though…except for maybe onetime).
Recently I decided that I would challenge myself to make every single Christmas gift (and maybe even birthday gifts along the way) for Christmas this year.  I could focus on one or two ideas a month, make however many I needed to correspond to my gift list, and try not to spend any money doing it.  I wonder if I can only use supplies that I already have or obtain for free throughout the year.  This will be a fun challenge, and I am looking forward to also sharing these ideas with others.
If you are not someone who would ever actually make these things on your own, but you really like something you see, fear not.  I will be including some of the items I make and share here in my Etsy shop for purchase, as well.

So, for this first month of the year, I have made Monogram Art…
DSCN2091

DSCN2073First, I acquired the goods (by sorting through my craft stash).
DSCN2077


Then, I decided which one I wanted to do first.


After that, it was just a matter of cutting the background fabric to fit the frame, drawing a letter, cutting that out to make a stencil, cutting the letter out of black felt, gluing it into place, and putting the frame back together.  Simple.

I also did this with other frames and different fabrics.
DSCN2086DSCN2087


This is a fairly quick project, and even if you don’t have all the supplies, you can find them inexpensively.  You don’t have to buy a new frame because you may be able to find one that has an old picture or painting in it that you can use (I did this with the J one).  Also, I used felt for most of the letters, which is very inexpensive.  The possibilities are endless, I suppose.
So go make your Christmas list for next year, pick a few people who would enjoy something like this, and give it a try.  You’ll be one step ahead already, and it’s only January!